
Your cart is currently empty!
DIY Macrame Wall Hangings for Beginners: Crafting Art for Your Home
In this world of mass-produced decor, there’s something special about creating your art, and macrame wall hangings provide the perfect way to do just that. Macrame is an ancient craft that’s growing in popularity, especially as more and more people find ways to bring a handmade, boho-chic vibe into their homes. Don’t worry if you’re just starting, macrame is easier than it looks. Simple lace projects are a great place to start for anyone looking to get their hands dirty with DIY home decor.
In this guide, we’ll walk you through the basics of creating your first DIY macrame wall hanging—a project that’s not only fun but will also leave you with a beautiful piece to proudly display in your home.
Why DIY Macrame Wall Hangings?
Wall art is often a big part of a room’s design, and lace wall hangings are a great way to add texture, warmth, and personal style. Unlike store-bought decor, creating your macrame allows you to customize it exactly how you want it—you can choose colours, patterns, and sizes that fit your space. Plus, lace is both relaxing and rewarding. It’s a thoughtful tool that allows you to slow down, work with your hands, and create something special. You don’t need expensive materials or complicated tools, just a few simple strings, dowels, and a little patience.
The Essentials for Easy Macrame Projects
Before we get into the crafting process, let’s take a look at the materials you’ll need to make your DIY macrame décor:
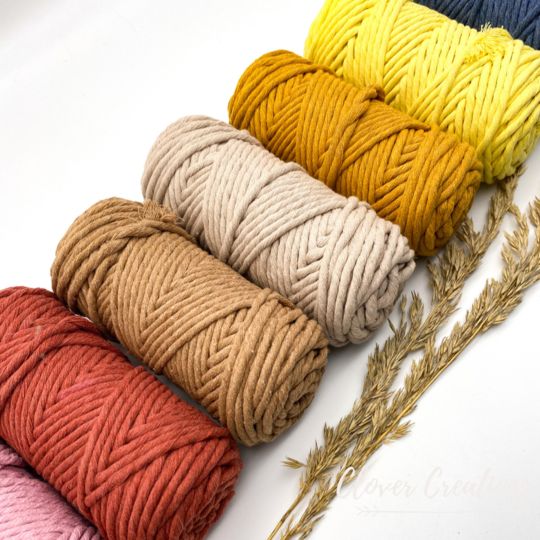
- Macrame Cord: The type of cord you choose will influence the look and feel of your wall hanging. Cotton cord is the most common choice, offering a soft, natural texture that’s easy to work with. Other options include hemp, jute, or coloured yarn.
- Dowel or Branch: This serves as the base of your wall hanging. You can use a wooden dowel for a clean, modern look or a branch for something more rustic and earthy.
- Scissors: Sharp scissors are a must for cutting through the thick macrame cord.
- Measuring Tape: You’ll need this to ensure your cords are the right length for your project.
How to Make a Simple Macrame Wall Hanging
For your first macrame wall hanging, we’ll keep things simple with a basic design that uses two fundamental macrame knots: the Lark’s Head Knot and the Square Knot. Once you’ve mastered these, you can experiment with more complex patterns.
Step 1: Prepare Your Cord
First, decide how large you want your wall hanging to be. A good rule of thumb is to cut your cords four times the length of the desired finished piece. For example, if you want your wall hanging to be 20 inches long, cut your cords to 80 inches.
You’ll need at least 8 to 10 cords to create a decent-sized hanging. Make sure they’re all the same length before moving to the next step.
Step 2: Attach the Cord to the Dowel
Using the Lark’s Head Knot, attach each piece of cord to your dowel. To do this:
- Fold your cord in half to create a loop.
- Place the loop over the dowel.
- Pull the loose ends through the loop and tighten.
Continue this process until all your cords are attached to the dowel.
Step 3: Master the Square Knot
The Square Knot is the foundation of many easy macrame projects. Here’s how you make it:
- Take four cords—two middle cords will remain stationary, while the outer two do the knotting.
- Cross the left cord over the middle cords, then place the right cord over the left, under the two middle cords, and up through the loop.
- Pull tight and repeat on the opposite side to complete the square knot.
Step 4: Create Your Pattern
Now that you know the Square Knot, you can start building a pattern. You can create rows of square knots, alternating them to form a diamond or checkerboard pattern. This adds texture and visual interest to your wall hanging.
For variety, you can also try the Half Hitch Knot, which is great for creating diagonal lines or arches. Get creative and mix up these knots to make a pattern that suits your style!
Step 5: Finish and Trim
Once you’ve completed your design, trim the ends of your cords to your desired length. You can cut them in a straight line for a clean look or trim them at an angle for a more bohemian vibe.
Unique Ideas for DIY Macrame Decor
Once you’ve mastered the basics, the possibilities for macrame are endless. Here are a few ways you can take your DIY macrame projects to the next level:
- Incorporate Color: Use dyed cords or colored yarn to add a pop of color to your wall hanging. This works especially well if you’re matching the décor in a specific room.
- Add Beads or Feathers: For an extra decorative touch, string wooden beads or attach feathers to your cords. This can give your wall hanging a more earthy, organic feel.
- Vary the Size: Once you’re comfortable, try making both small, delicate wall hangings or larger, statement pieces that will serve as the focal point of a room.
Why Macrame is the Ultimate DIY Decor Trend
Macrame is more than just a craft—it’s a form of artistic expression. Each knot and design reflect the maker’s creativity, which makes it an incredibly personal and meaningful way to decorate your home. Unlike other décor trends that come and go, macrame has stood the test of time, from its roots in ancient cultures to its revival in the 1970s and now, in the modern era of DIY home décor.
The beauty of macrame lies in its simplicity and versatility. Whether you want to add a subtle accent or create a bold statement piece, macrame wall hangings can transform any space, making it feel more warm, inviting, and uniquely yours.
Final Thoughts: Start Your Macrame Journey Today!
Whether you’re looking to create your first piece or are searching for your next project, macrame wall hangings offer the perfect blend of creativity and functionality. With just a few simple knots and materials, you can design a stunning, one-of-a-kind piece that brings personality and texture to your home.
So, grab your cord, follow this guide, and start your macrame journey today. Before long, you’ll be crafting your own beautiful DIY macrame décor that you—and your guests—will love!
Recent Posts
- Modern Elegance Meets Gujarati Heritage: Macrame for New Year Decor
- History of Macrame Across Cultures: From Ancient Techniques to Modern Revival
- Threads of Tradition: Gujarat Macrame Ideas to Welcome the New Year
- Weaving New Beginnings: Gujarat Macrame Decor for a Stylish New Year
- Winter Wonderland: Using Macrame to Create a Cozy Christmas Vibe
Archive
Tags
.macrame art Artisan journey Beginners guide Bohemian home decor Community empowerment Custom macrame DIY macrame decor easy macrame projects Festive decoration Garba accessories Gujarat artisans Gujarat craft Gujarat handmade Gujarat India Gujarat macrame artisans Handicrafts handmade Handmade curtains Handmade decorations Handmade Gujarat Handmade products High-quality macrame Home decor home décor trends Innovative macrame Karva chauth home decor Local artisans Local craft Local products macrame art for beginners Macrame curtains Macrame Knots Macrame potli Macrame process Macrame products Macrame tools Macrame torans macrame Wall décor macrame wall hangings Materials for beginners Modern home decor Navratri fashion Personalized macrame Personalized products Sustainable Navratri decor